| title | slug | description | tags | category | difficulty | time | keywords | location | ||||||
|---|---|---|---|---|---|---|---|---|---|---|---|---|---|---|
| El Tornillo Motor Injection Machine | el-tornillo-motor-injection-machine | This injection machine runs with a motor to save some labor and output more pressure to make more detailed products. |
|
Machines | Hard | 3-4 weeks | Bogota, Colombia |
El Tornillo Motor Injection Machine
 This injection machine runs with a motor to save some labor and output more pressure to make more detailed products.
User Location: Bogota, Colombia
Steps
Step 1: Machine description
Machine design: Motor Injection Machine
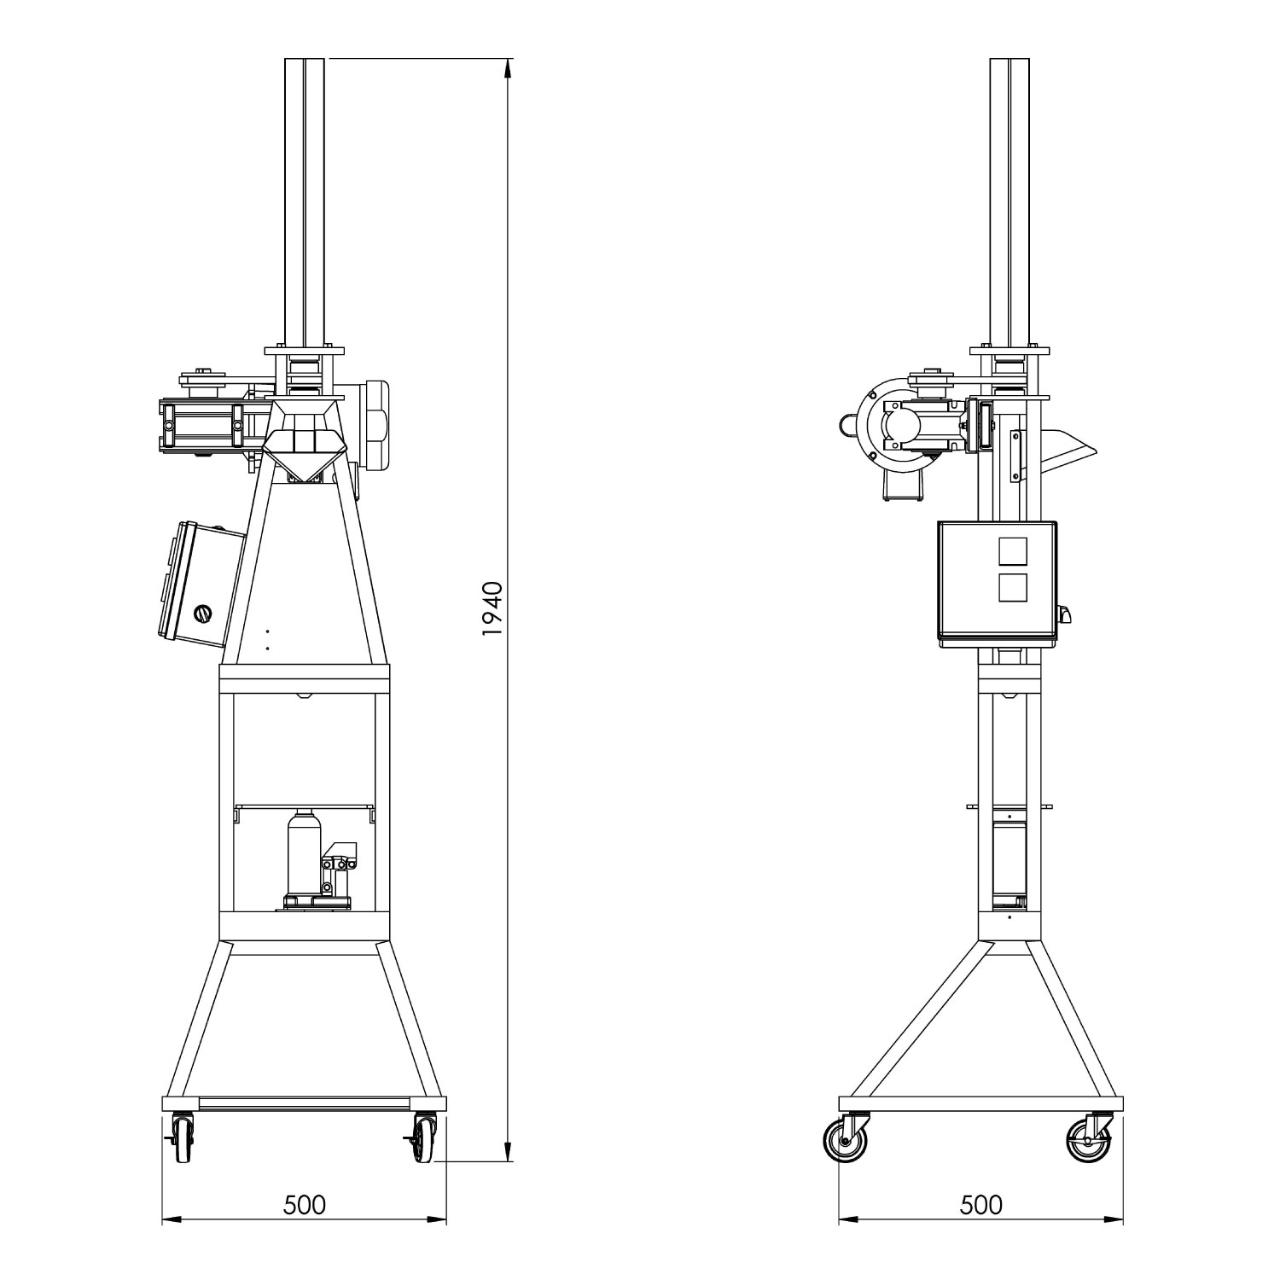
Machine size: Heigth: 195CM; Wide: 50CM; Large: 50CM
Machine cost: In Colombia, Bill Of Material = COP$4,700,000
What makes your machine different to others: This machine has a motor that will apply the pressure (versus a hand powered lever on older versions). It can be considered an upgrade to [filtered] Basic Injection Machine, available on the academy.
Compatible with: This machine is suitable for injection moulds.
Type of plastic: PP, HDPE, LDPE, PS
Step 2: Tools needed
To build this machine, you will need:
-- Turning (machining on a lathe) -- Milling (machining on a mill) -- General metalworking (cutting, drilling) -- Welding -- Advanced assembly work (require specific tools, measurement instruments and tolerances knowledge to align and assemble) -- General electrical work (wiring safety switch, temperature controllers…) -- Motor electrical work (wiring motor, contactor, overload protection…)


Step 3: Build the machine!
Watch this video to find out how to build this machine!
0:00 Before you start 3:09 Motor Injection Machine intro 3:36 Chapter I: Build the frame 7:12 Chapter II: Build the mould area 8:25 Chapter III: Build the piston system 14:39 Chapter IV: Build the heating barrel 17:51 Chapter V: Electrical wiring 18:56 Chapter VI: Connect the motor 20:10 Chapter VII: Assembly
Step 4: Inject!
How to use the machine
- Turn on the machine and fill the barrel with plastic.
- For the first injection, wait 25 minutes since the machine was turned on and filled.
- Place the mould over the jack surface and press it against the nozzle tightly.
- Turn on the motor to move down the piston, pushing the molten plastic inside the mold until the belt starts slipping in the pulley.
- Turn off the motor and wait around 5 seconds maintaining the piston pressure.
- Then turn the motor backwards to move the piston up
- For continuous injections refill the barrel before removing the mold from the nozzle
- Remove the mold by lowering the jack
- Open the mold and take out the injected part
- Close the mold and repeat the process from step 3
Recommendations For this machine, you will need molds that have a connical nozzle connection or create an adapter to fit with you mold nozzle. This machine can create a lot of pressure so you will be able to inject products with very thin walls.

Step 5: Buy on the Bazar
So this is how you make a Motor Injection Machine!
If you cannot replicate the machine or simply want to buy some of the other machines or moulds I create, make sure to visit my Bazar shop 🤑 !
