| .. | ||
| config.json | ||
| diagram-188ae76e58f.png | ||
| filter-support-1889026bd6f.jpg | ||
| fregona-188903634d6.jpg | ||
| holes-18890315113.jpg | ||
| IMG_2365-1889035a4cf.jpeg | ||
| IMG_3374-188908d3617.jpeg | ||
| IMG_3485-188908d4b90.jpeg | ||
| index.mdx | ||
| Marea - Copy of Sin bomba adicional-188ae6e4263.jpg | ||
| marea_-_copy_of_sin_bomba_adicional-188ae6e4263.jpg | ||
| montaje copy-18890866104.jpg | ||
| montaje_copy-18890866104.jpg | ||
| montaje-filtro-18890256c7e.jpg | ||
| PICT0003-188908ce773.jpg | ||
| README.md | ||
| references.md | ||
| resources.md | ||
| step1-1-188900382f3.jpg | ||
| step1-2-188900377b8.jpg | ||
| step2-2-18890041c40.jpg | ||
| step2-3-18890045a98.jpg | ||
| step2-4-18890040f5c.jpg | ||
| title | slug | description | tags | category | difficulty | time | keywords | location | ||
|---|---|---|---|---|---|---|---|---|---|---|
| Low cost Washing Machine with water filter system | low-cost-washing-machine-with-water-filter-system | Learn how to modify any laundry machine to enable it for plastic washing without wasting any water drop. This guide will show you how to modify the electric system and add a water tank with a custom 3d printed sand filter. |
|
Machines | Medium | < 1 week | Malaga, Spain |
Low cost Washing Machine with water filter system
 Learn how to modify any laundry machine to enable it for plastic washing without wasting any water drop. This guide will show you how to modify the electric system and add a water tank with a custom 3d printed sand filter.
User Location: Malaga, Spain
Steps
Step 1: Check the video to see if the solution fits you!
I've been experimenting to achieve the following hack with the idea to build the most simple, universal and cheap laundry machine. The design is based in the gravity force, so the water can run through the system with that force and the small 40W power of the outlet pump (that every laundry machine has). This is the best solution for small workspaces with a flow of 20-50 kg day using short washing programmes, for sure if you manage more than that you can build multiple machines or build the one of the mate ->
Video -> youtube.com: youtube.com/shorts/2LW2zV2ksLE?feature=share
Complete guide available in the main download link Content of the folder: 1- Guide with more information + BOM (everything in one .pdf) 2- STL files for the filter and the support (.stl files) The folder will be updated when new info/changes are implemented to the guide.
ENJOY!!

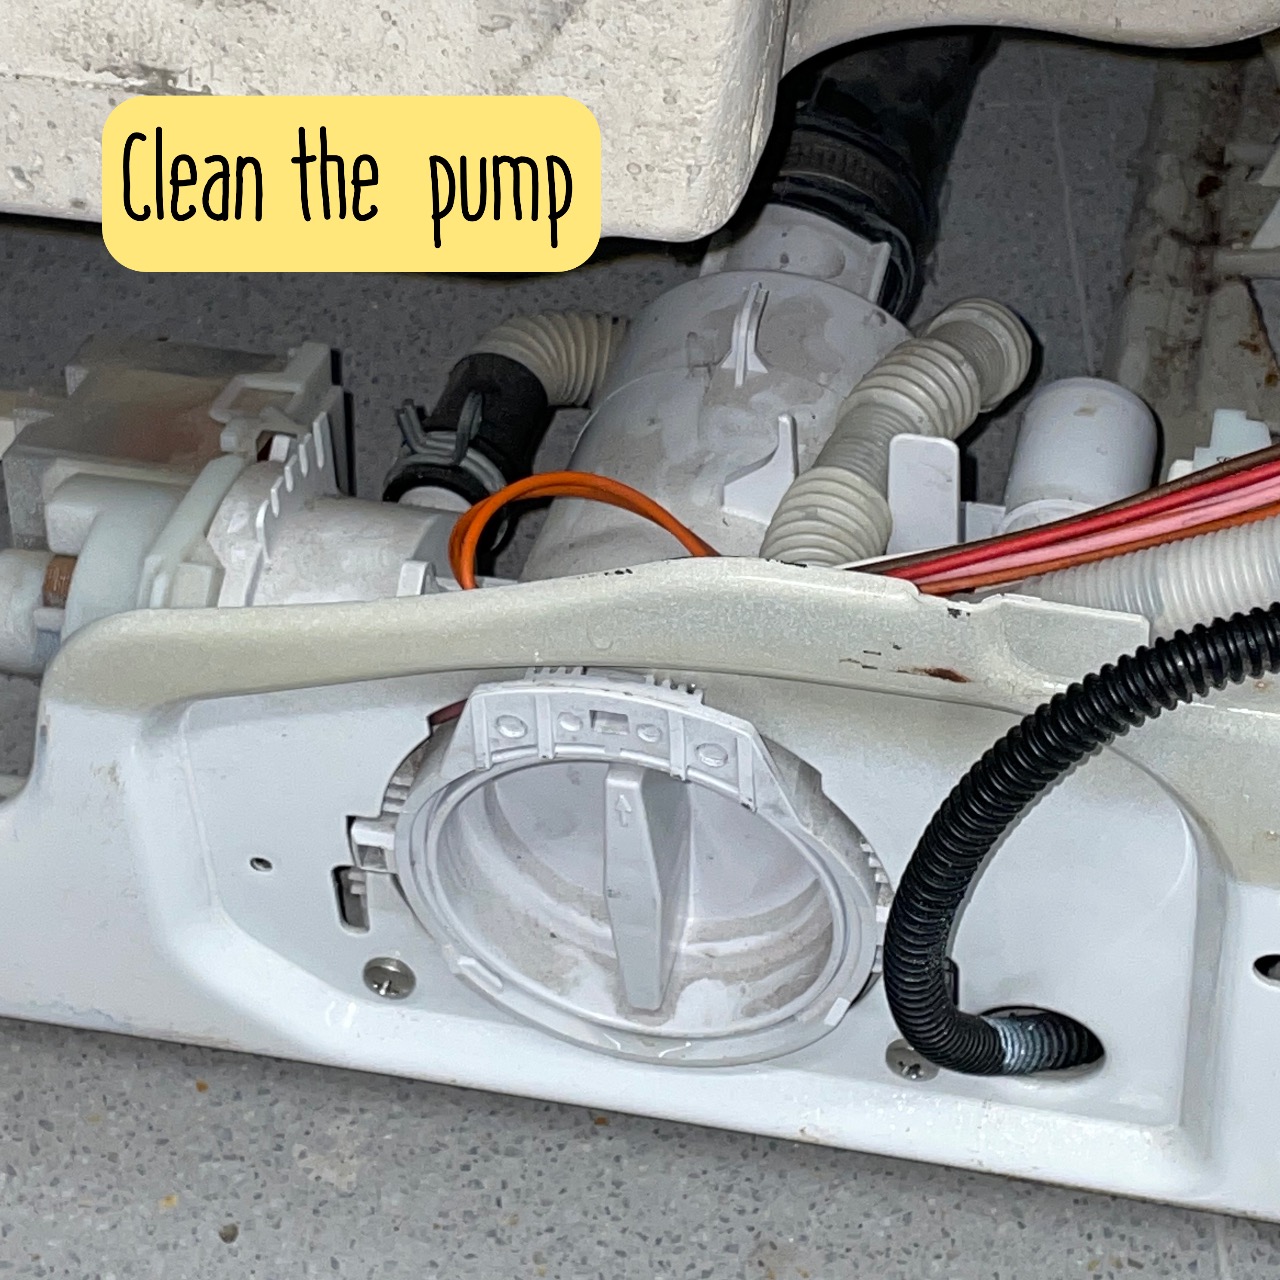
Step 2: Dissambly, clean the machine
Make sure before starting the process to pour out the water inside the machine.
1º Remove the top and the back plate 2º Take apart the water input system and the cleaning box 3º Clean the pump and the drum

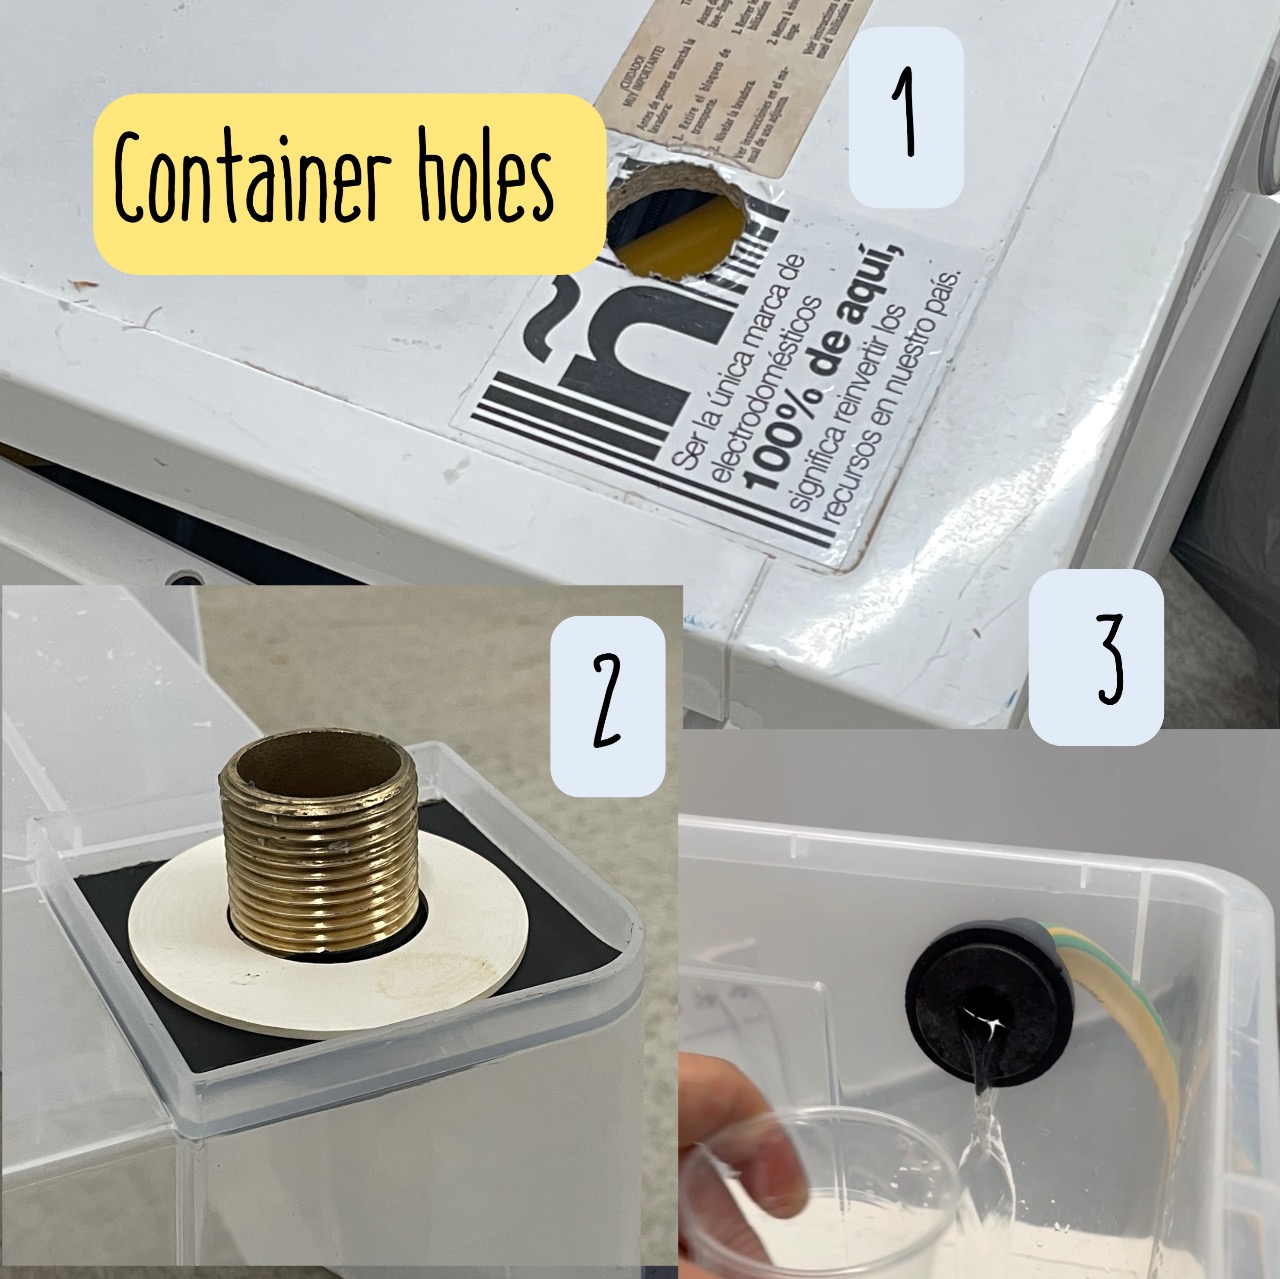
Step 3: Making holes and assembly of the hack
I'm using a 55L container from Ikea ~10€. I've tried two containers from cheaper shops and both are now broken. You a need a good plastic to support the pressure of the contained water and the stress of making the holes.
For the assembly, we need two pipes bushing of 1", one is for the water inlet and the other water outlet. 1-Hole should be centred with the drum inlet 2-Hole in the container 3-Hole for the water input
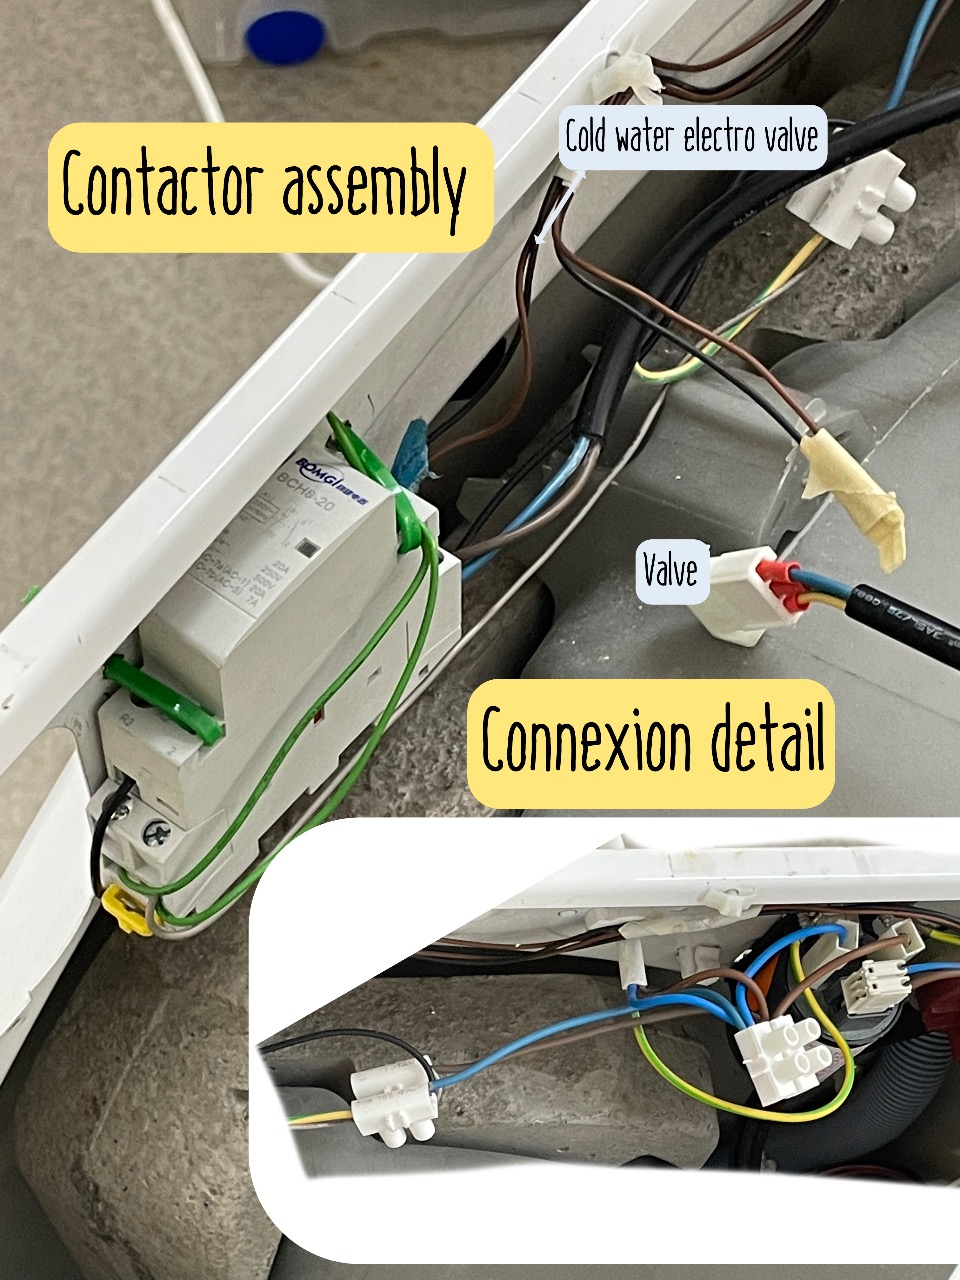
After the holes are made it is time to play with the wiring, you'll require some welding skills if you want a reliable results. I'm using security connectors and heat shrink covers to avoid water damage or electrocution.
For the assembly, I've mounted the Contactor in the back wall with a fastening clip.
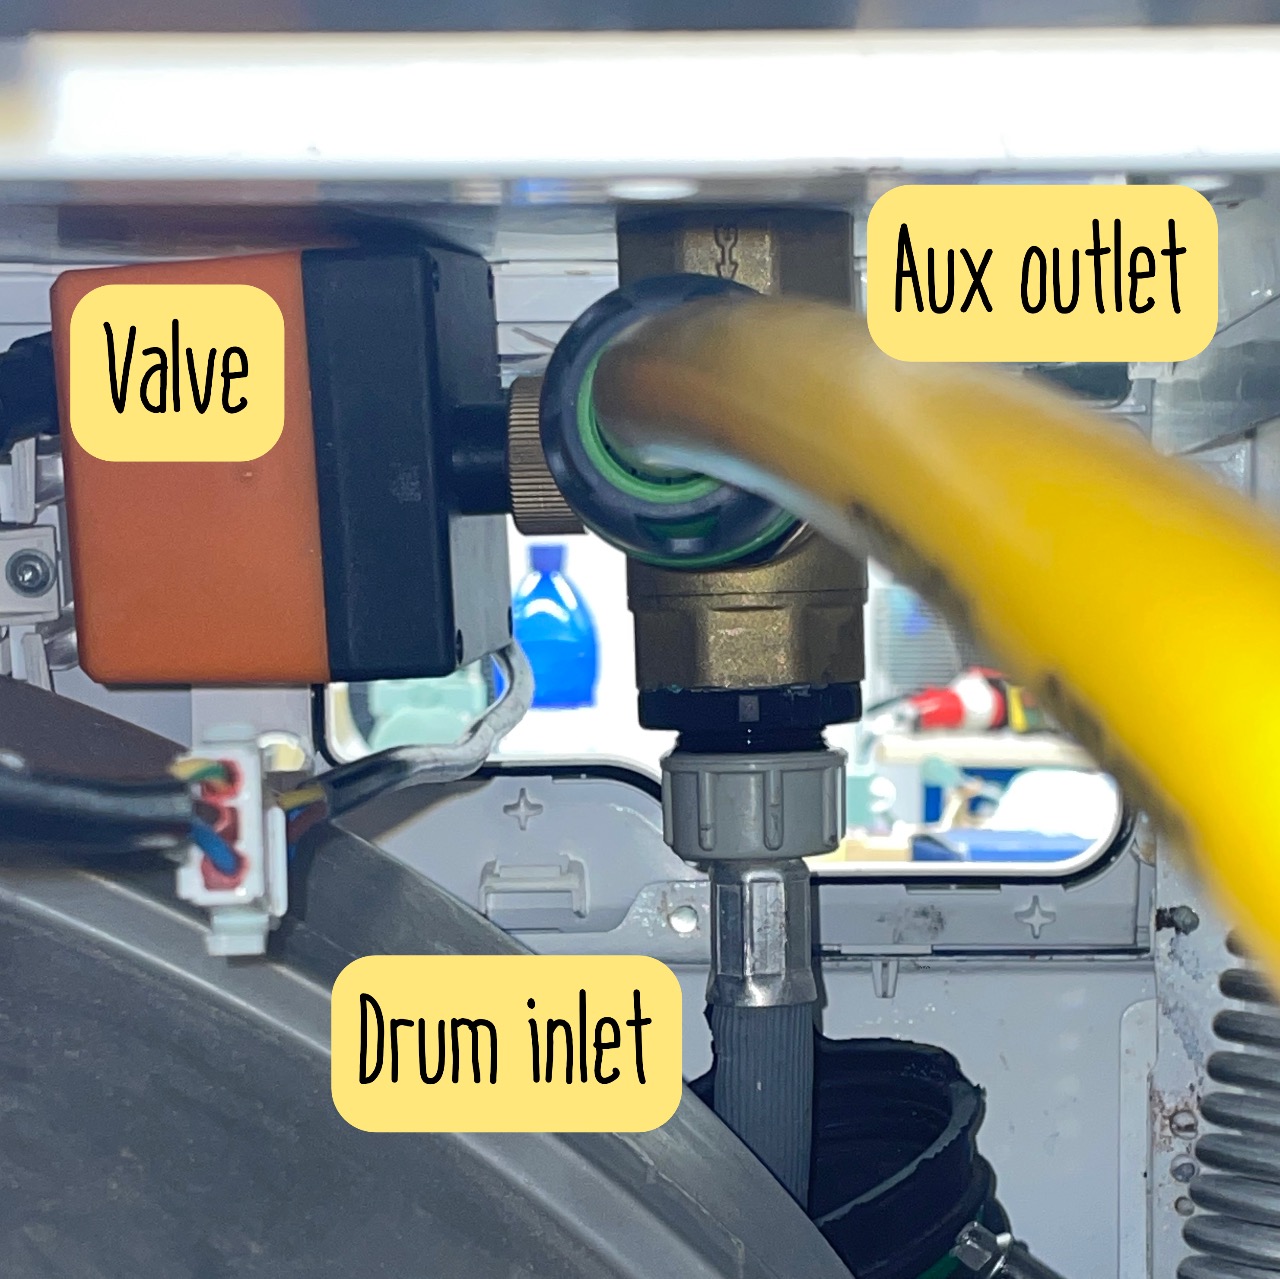

Step 4: Make the electric set up
Before making the assembly, make sure that the valve is corrected positioned and it's working fine. Use some teflon for the connections of the valve with the pipe adapter.

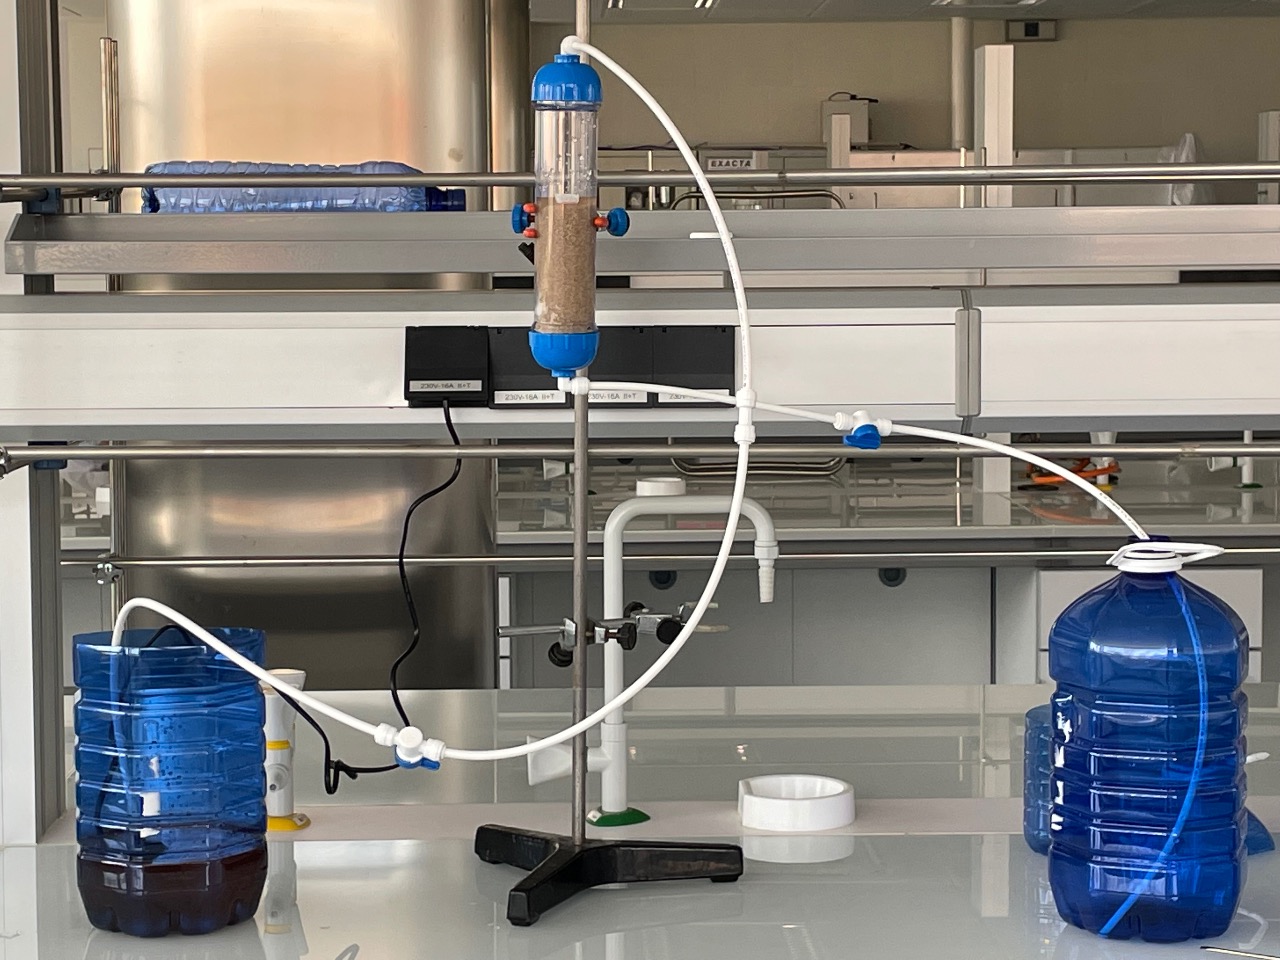
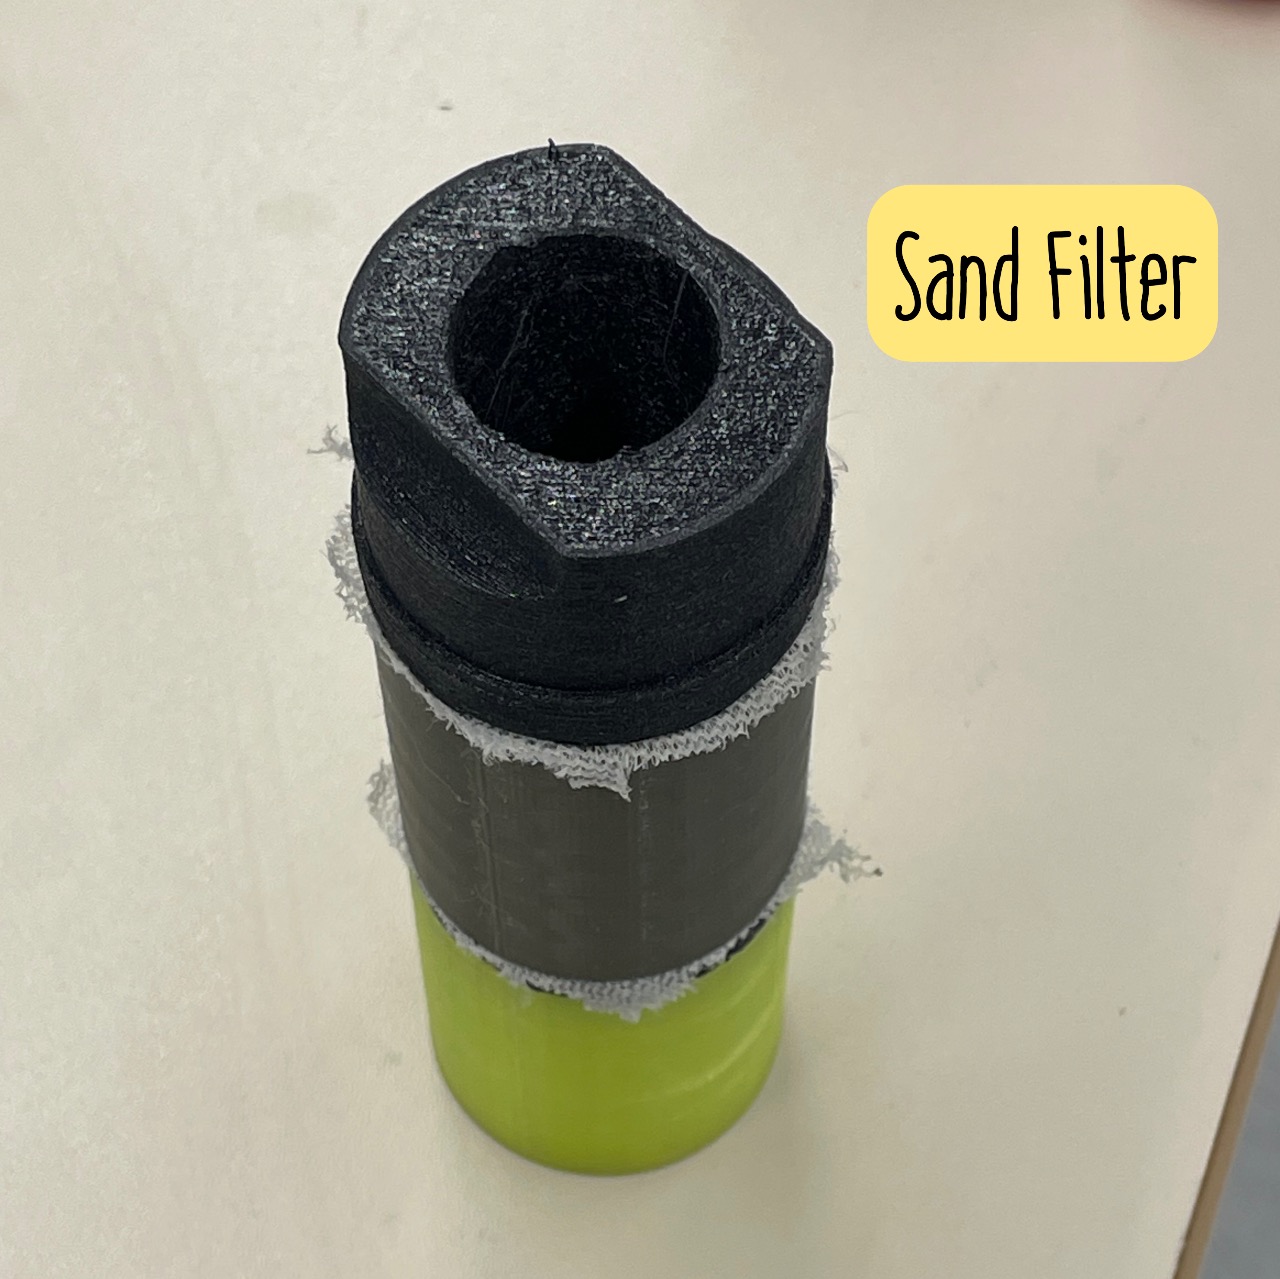
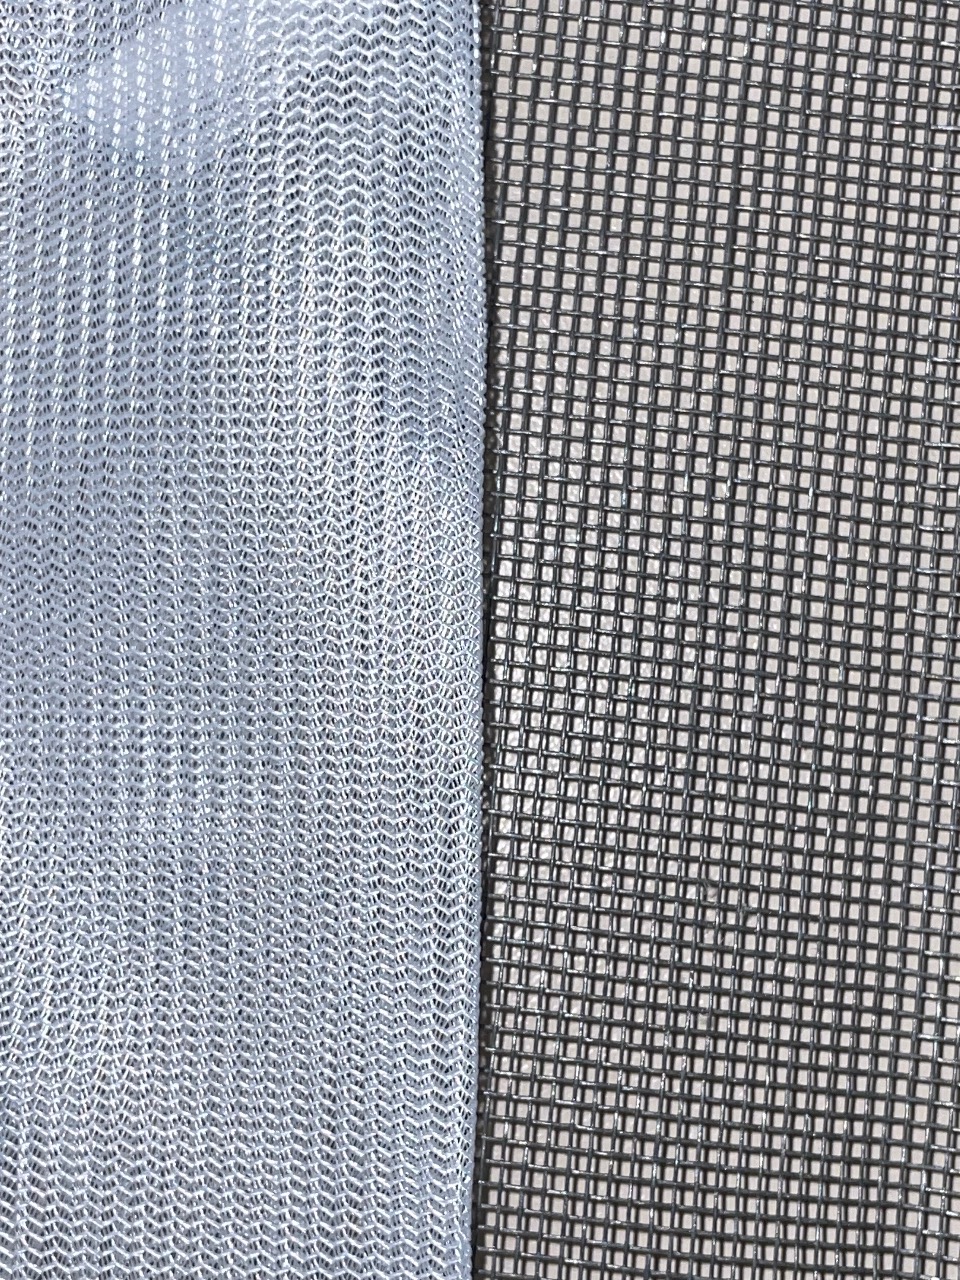
Step 5: Build and assembly the filter and filter support
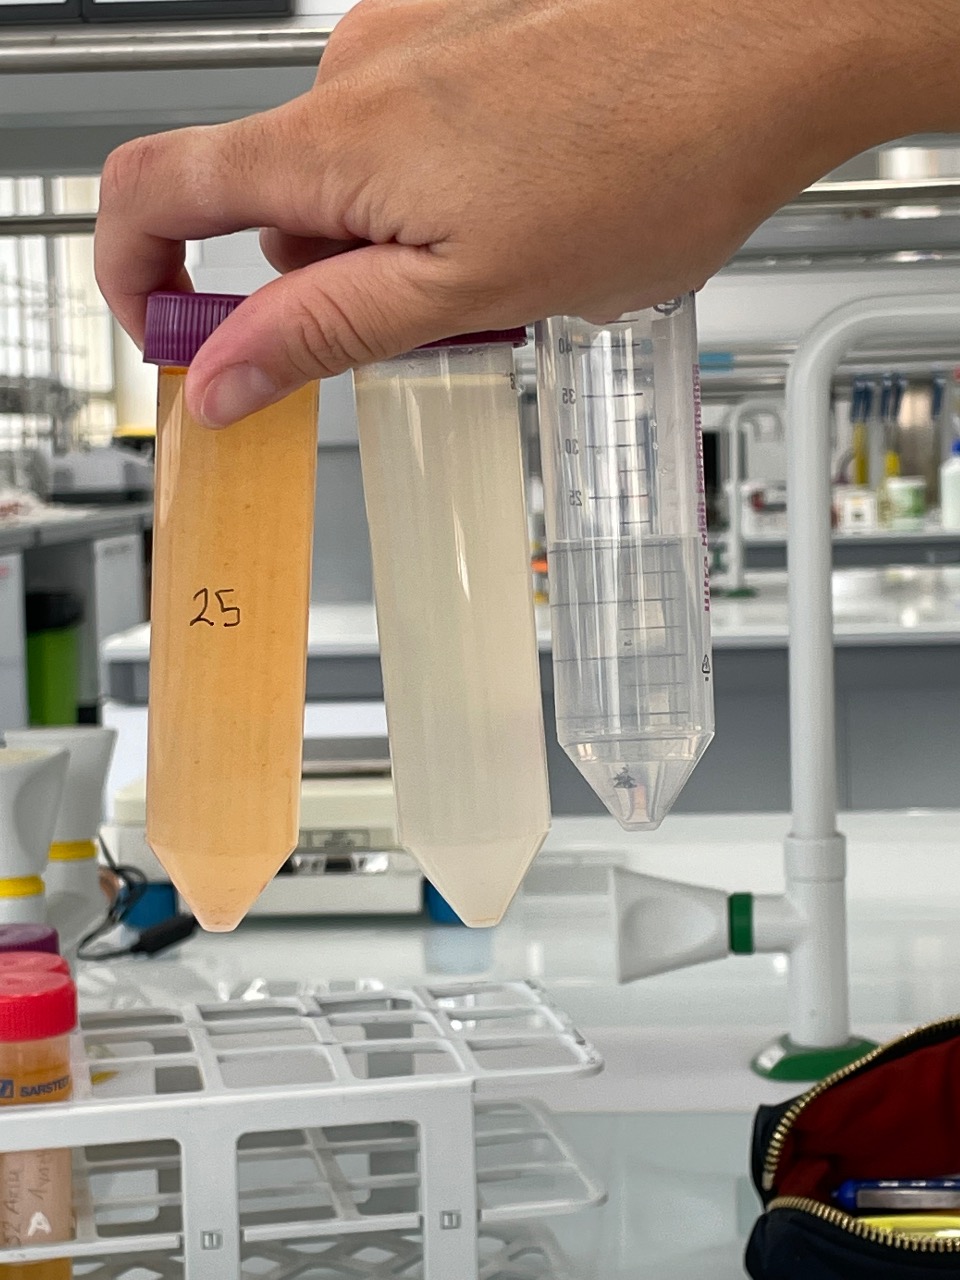
Print the required files. Between components put the nets. Make required holes for the filter support, attach the filter and connect to the water system! Ready for testing. Fill the filter with sand until the main body is 1/4 covered.

Step 6: Attach the auxiliar container and test
Fill the main container, make sure you've attached the aux container. Fit an extra manual valve to avoid the water go to the incorrect path. Test it and fix water leaks!

