| .. | ||
| files | ||
| 1-186b9edca1b.jpg | ||
| 2-186b9edd6fb.jpg | ||
| 1677472925922-186b9ed1ba3.jpg | ||
| Bracelet3-186b9f1b882.jpg | ||
| config.json | ||
| DCD04845-6D8A-40F6-87F8-ACCD0D7B3995-186b9f17bb3.jpg | ||
| F5026EBC-6784-417A-938C-C6C194F6CF61-186b9f184d5.jpg | ||
| IMG_0507-186b9f99eaa.JPG | ||
| IMG_0512-186b9efa47f.JPG | ||
| IMG_0516-186b9ef8603.JPG | ||
| IMG_4551-186b9f995e4.jpg | ||
| IMG_4998-186b9eff1e1.jpg | ||
| IMG_5033-186b9ecd833.JPG | ||
| index.mdx | ||
| led-1-186b9f0f77e.jpg | ||
| moldbeads.zip | ||
| README.md | ||
| references.md | ||
| resources.md | ||
| title | slug | description | tags | category | difficulty | time | keywords | location | |||
|---|---|---|---|---|---|---|---|---|---|---|---|
| Multishape beads mould | multishape-beads-mould | A mini beads mould to create various shapes at the same time! Can be used for any kind of jewellery creations. Here are the steps to make one! |
|
Moulds | Medium | < 1 hour | Bangkok, Thailand |
Multishape beads mould
 A mini beads mould to create various shapes at the same time! Can be used for any kind of jewellery creations. Here are the steps to make one!
User Location: Bangkok, Thailand
Steps
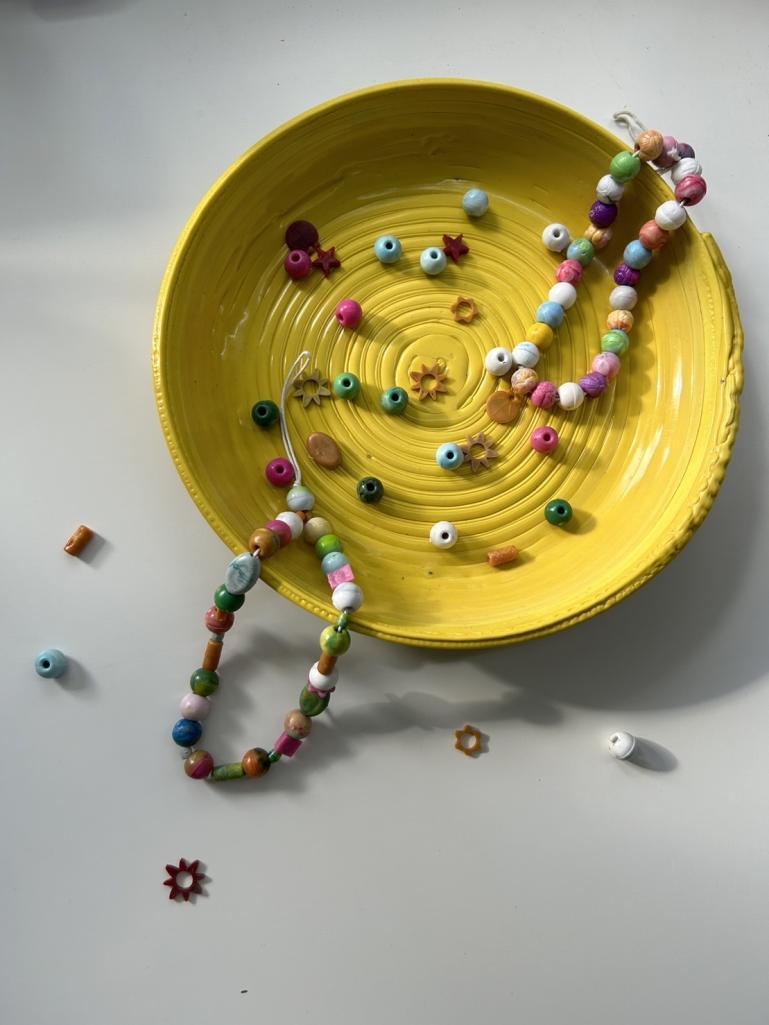
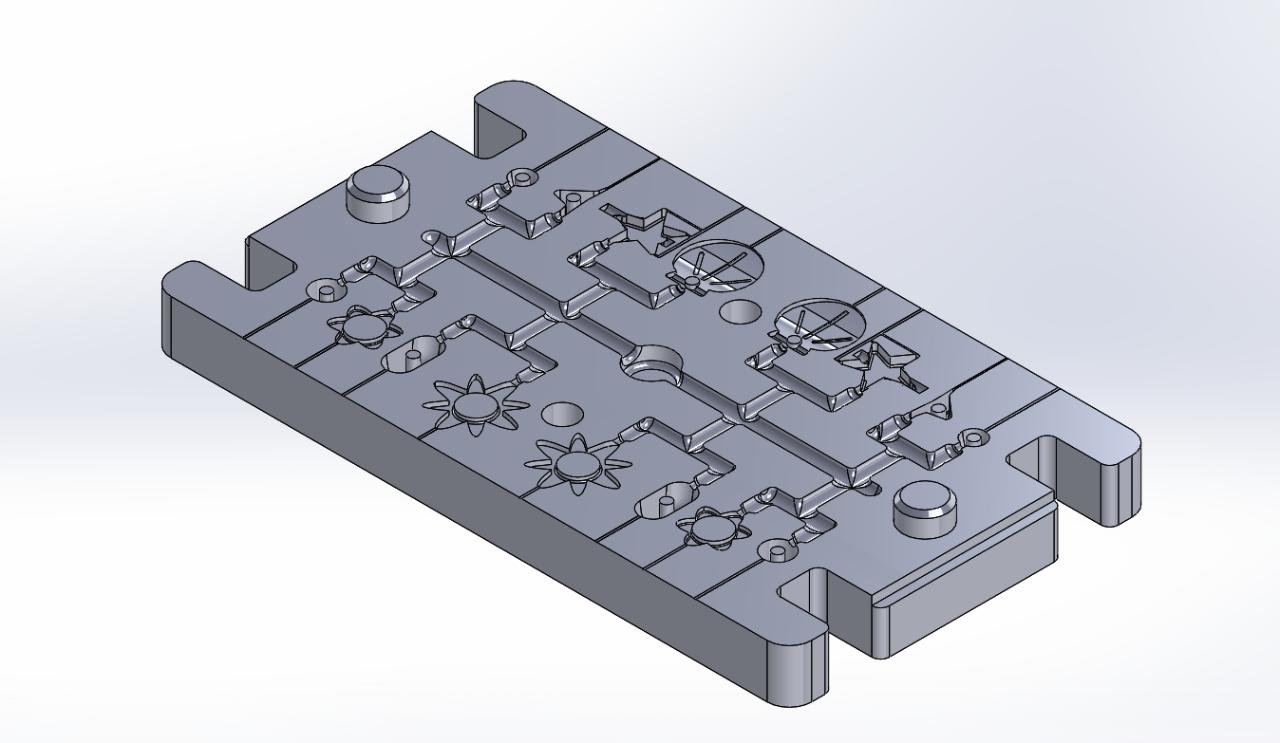
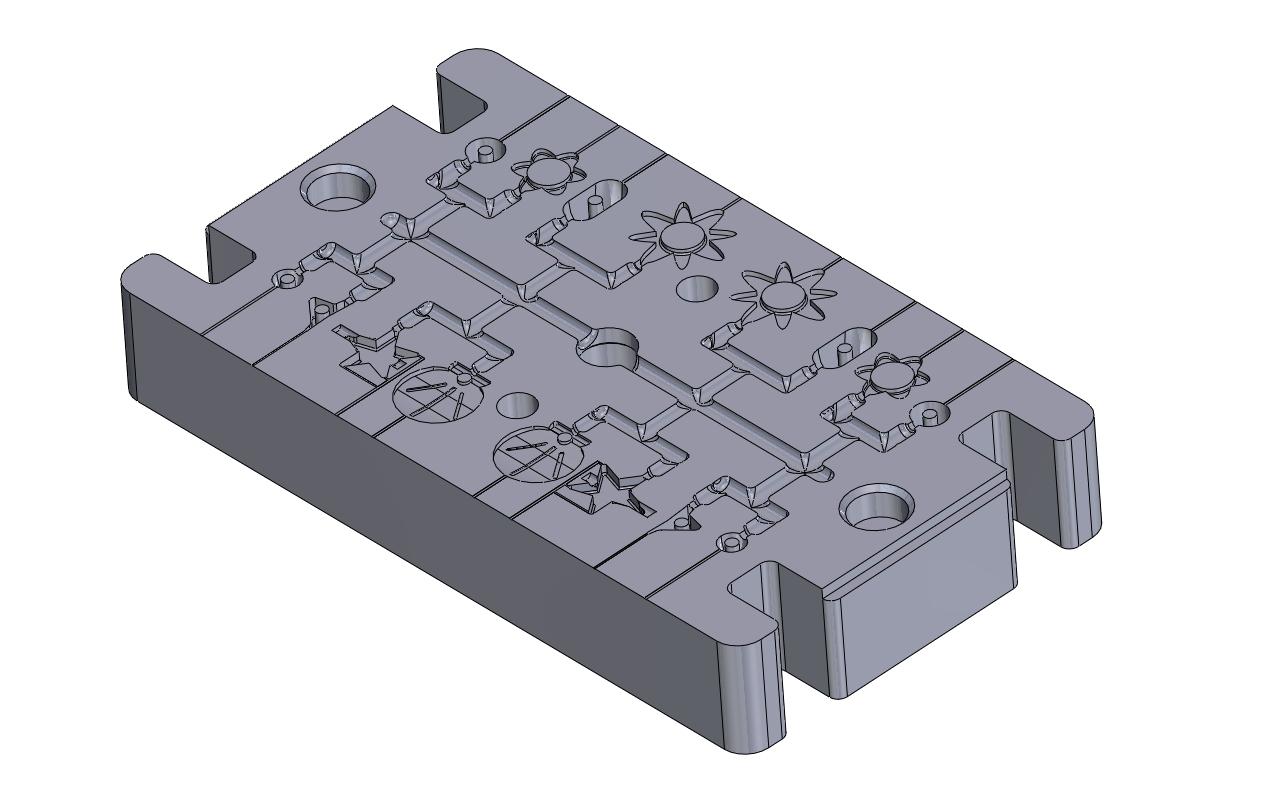
Step 1: Bead shapes
As we want different sizes and shapes of beads, we need to make the mould with cavity balance. You can design the shapes you desire for such jewellery just think about types/sizes of cords you would want to use them with (the bead hole in the mould should be bigger than the cords size about 3%) The bead holes should be aligned vertically with the mould detachment line. So, we bisected each bead at its centre except the starred shape due to the CNC machine limitation if we placed it vertically. We need a dowel pin to make the bead hole instead.

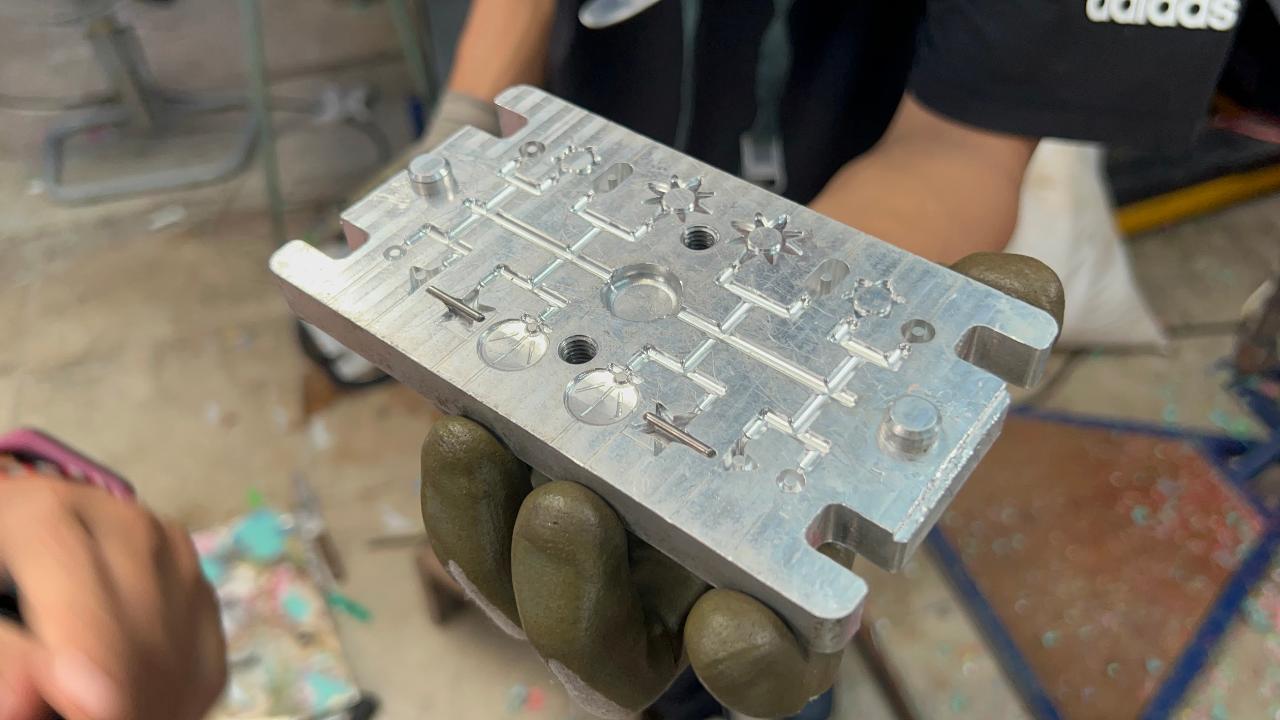
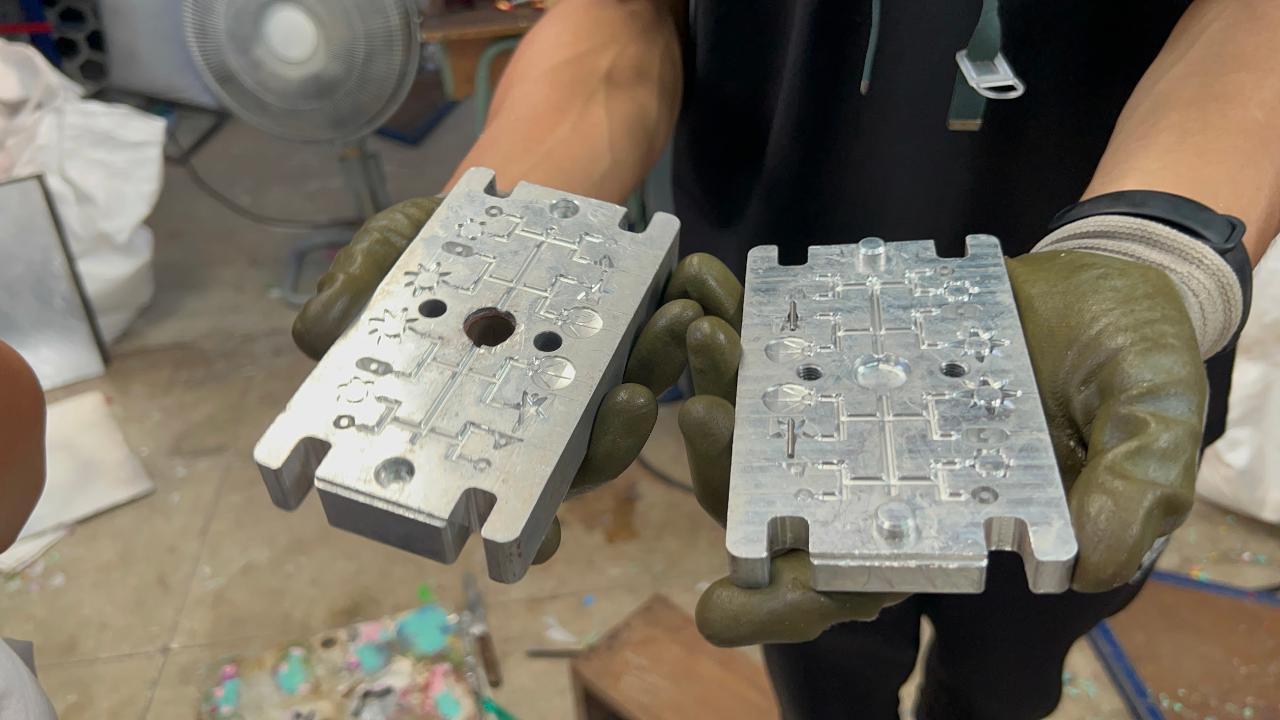
Step 2: The mould
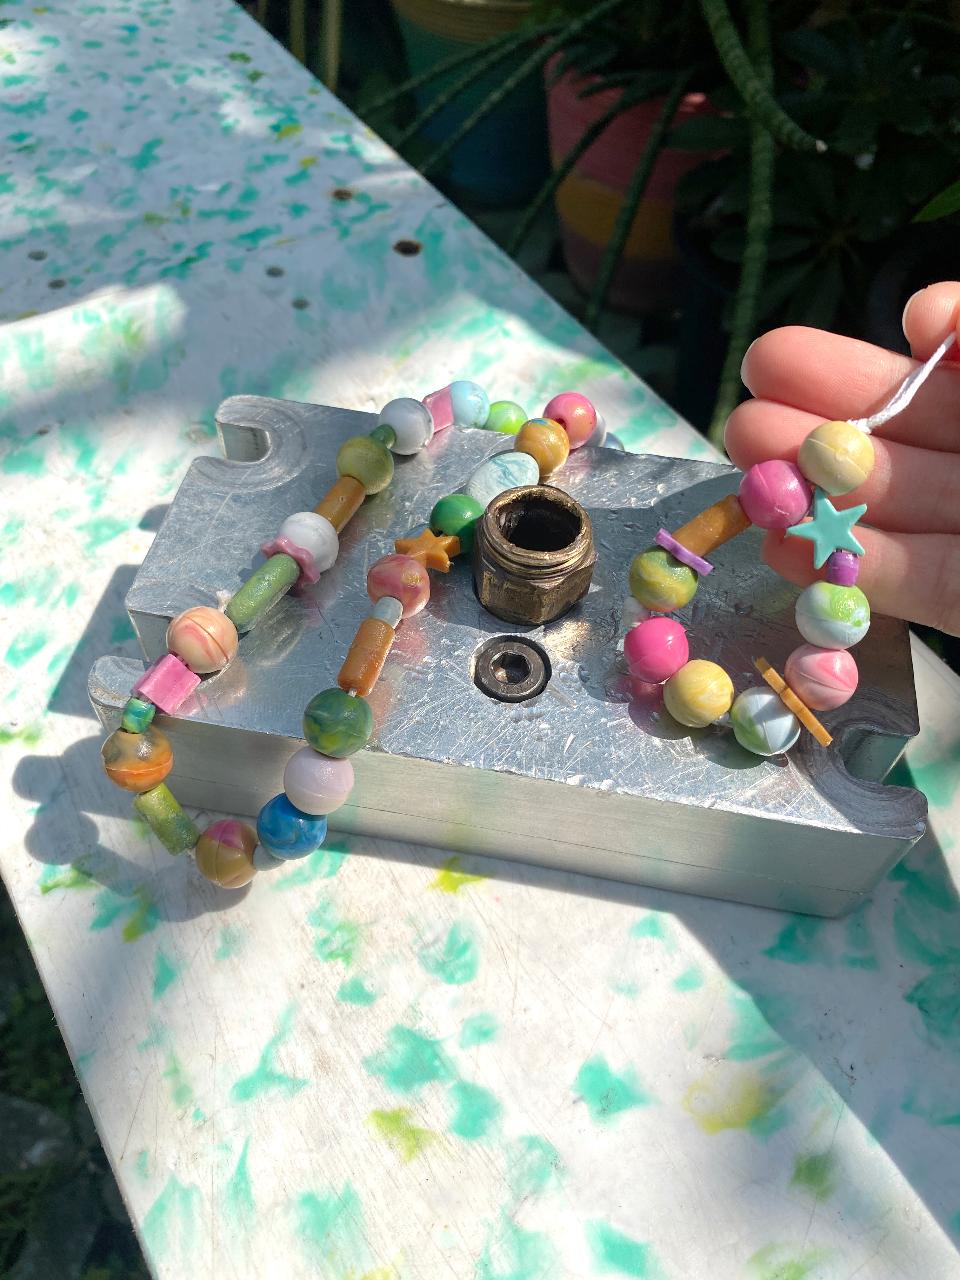
There’re 16 bead cavities in our mould, the number of beads depends on the barrel capacity. You’d want to adjust the number of beads per mould as appropriate, just balance the mass of plastic on each side, according to the direction of plastic flow. Or please feel free to download our version down below! Finally, the bottom and top parts are CNC-milled out of 2 blocks of aluminium and it comprises a total of 3 pieces; bottom and top parts made of aluminium, and a dowel pin for the star bead. The top part is attached to a bronze nipple (1/2inch NPT)
Step 3: Mould assembling
Tools needed: Gloves, Mask, 17 Wrench, 4 Allen wrench Machines needed: Injection machine and a shredder (or shredded plastics)
Make sure the mould is clean then place the dowel pin in the star shape and connect the top and bottom parts, using the guide pin to help with the alignment. Insert the M10 bolts at 4 corners and 2 bolts counter bore in the 2 holes at the centre. Now, injection time!
Step 4: Inject
Put the shredded plastics into the injection machine, set the temperature at the proper melting point of your plastic types. After heating the machine (keep the handle bar down to have pressure on the plastic), lift the bar up and circle your mould in the injector (Don’t forget to wear a protective mask and gloves) Inject the melted plastic into the mould by pulling down the bar as hard as you can. Wait for a minute to maintain the pressure on the plastics (the duration depends on the plastic types as well)

Step 5: Crack it open!
Lift the bar up a little bit and unmould (don’t forget to close the injection to prevent the plastic dripping from the barrel) . Unscrew all bolts and use a slotted screwdriver to help open the mould along the marks. Hammer the plastic out of the mould from the back through the nozzle connector (make sure the plastic has cooled down enough and don’t forget to remove the dowel pin)


Step 6: Finishing
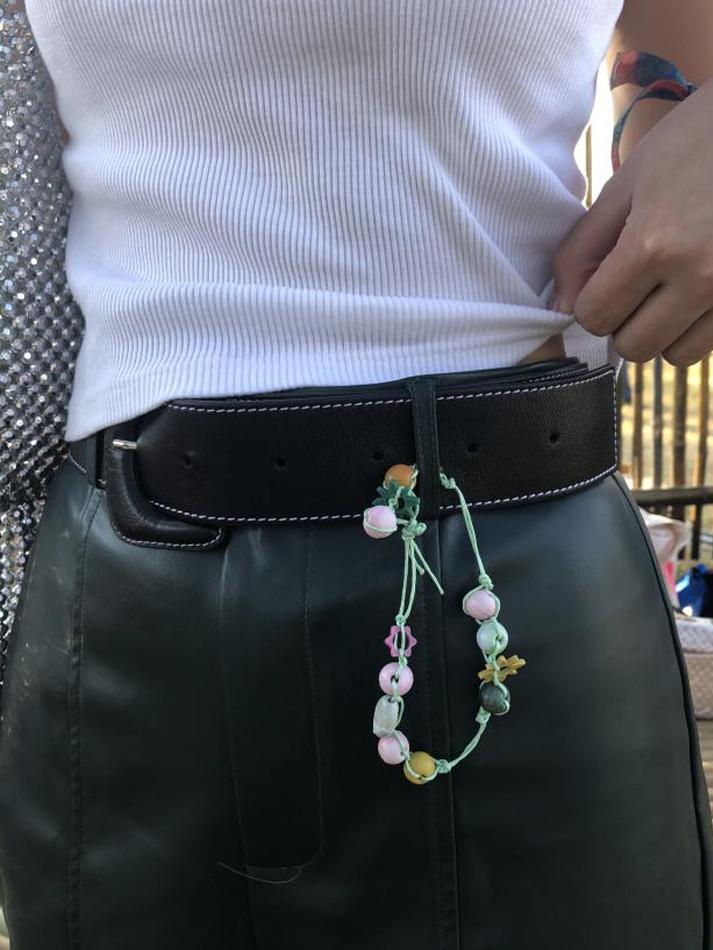
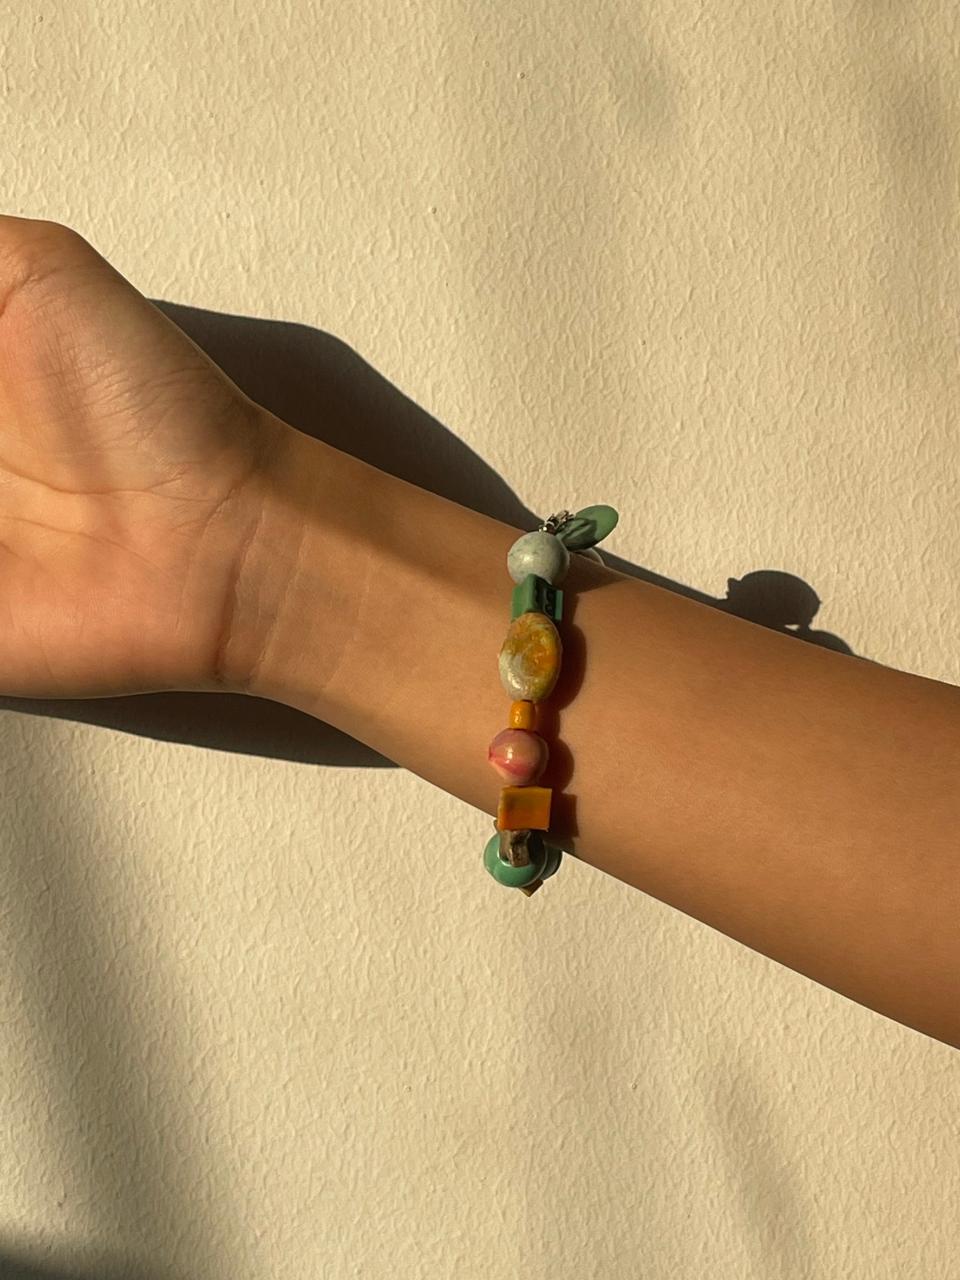
Cut all excess parts with a plier and it’s time for your beautiful creations.